Catalogue
Most brands consider Online shopping services to be a form
of catalogue as it shares the same principles as a paperback magazine (even
though not necessarily tangible on paper). When working for catalogue you are
expected to complete not only the makeup application but the hair too! The
daily working hours can be a minimum of 16hours long and being a MUA is intense
because your involved in every step; analysing images, touching up and
photography. Time is money in this industry and you will be expected to work in
a fast pace environment as models need to be ready ASAP therefore you would
start with a natural look and build up on this gradually, by this I mean not
removing any products but adding ensuring there is still a natural finish – Make
up needs to suit the look not detract it from the outfit and don’t overpower
the collection genre e.g tailor down trends and keep within the restraints of
catalogue. You would usually be assigned a brief with certain looks you must
create, if you are assigned a brief this means you can; test shot, product
review, design, develop and evaluate in advance to ensure a successful outcome
(work smarter not harder). Finally, and most importantly you must plan to
ensure you can work efficiently towards your process, this will give you the
opportunity to overcome any potential issues and take away any pressure/ make
the day run smoother. Below I have
listed a few fashion and beauty catalogues which I will now talk about in
detail…
Asos – The makeup application on models is usually kept
classic and it can be translated to any age because the makeup is neutral and
so Is the hair.
Freemans – This is a British clothing catalogue that has
been around for 25+ years, they cover every age and style (The models range
from young to mature)
Avon – they purely sell beauty products unlike most.
Next
Very
River island ,Boohoo,Miss guided, Pretty Little thing
Little woods
Look 1 Natural Step by step

Step 1) identify
the Models skin type: Mature, Oily/ combination – it is important to ask
questions/ talk to your model and find out their skin type. Doing this will
give you an idea of what products will suit them and the brief for example, you
have been asked to create a beach look that will be photographed and your model
has dry skin you would use a primer with hydrating qualities, if really dry use
a cream moisturiser beforehand. It really does pay off prepping your models
skin
Step 2) Cleanse,
tone and moisturise
Step 3) prime the
models skin with Illamasqua matt veil and a flat brush

Step 4) Because
the foundation was thick Anna mixed it with the primer to thin it out and make
lighter. Anna then used a flat foundation brush and small strokes to apply the
base.
Step 5) Anna is
now using a clean buffing brush in circular motions, concentrating on the
hairline so it doesn’t look patchy and orange when photographed.
Step 6)
Illamasqua skin base lift concealer works a dream when working towards an even
skin tone, when applying this focus on blemishes and creases e.g the undereye
because when dark areas are captured on camera it can be exaggerated. When
working on catalogue touch ups are required throughout and this might consist
of re buffing the cream product to save product build up (caused by muscle
movement), remember less Is more! Reflective concealers are also great to use
on photoshoots

Step 7) powder
the T-zone depending on your models skin type. The look Anna designed is going
to be dewy therefor powder will not be needed as it will do the opposite by
mattifying the skin
Step 8) The brows
are going to be kept natural and not heavily over drawn or calved out. Anna
will be following the natural brow shape lightly with a powder and angled brush.
To make the brows soft and refused brush the product up through the brow. Run
brow gel through the brow on a disposable to manipulate and hold the hairs in
place (the desired direction)
Step 9) using a
rounded fluffy eye shadow brush and a Illamasqua muted brown matt eyeshadow,
apply this to the entire lid giving it a wash of colour

Step 10) apply a
darker shade of brown to the crease of the eye using contour techniques to give
the illusion of a shadow/ definition. Don’t apply a dramatic brown try and keep
within skin tones because you’re creating an illusion.

Step 11) Use a
small detailer brush and the same brown eye shadow you put into the crease and
repeat underneath the eye, ensure you use a tissue as a protector to catch the
fallout. Apply a brown liner to the lash line to tie the whole eye makeup look
together
Step 12) Apply
black mascara to the lashes to lengthen them, roll the wand through the lash
ensuring you reach right up to the lash line.
Step 13) Using
small amounts of product in circular motions buff the matt bronzer into the
skin. Once the model is under studio lights you can touch up the make up or add
powder throughout. studio lights are extremely hot and models tend to get warm
sweat under them, obviously, this will affect the make up as it becomes more
movable so to prevent it smudging a translucent powder would be applied to
absorb any shine and lock in the layers. To get a close of your final make up
application through a third eye ask the photographer to test shot you work so
you can solve problems beforehand e.g. redness or a build-up of product around
the nose.
Step 14) Apply a
lip liner to the corner of the top lip working in towards the cupids bow and
repeat on the other side, once this is done take your time mapping out the
cupids bow / joint each side as you want accuracy (use mirror to help and don’t
work from one side). Rather than getting your model to open his/her mouth like
at the dentist it is best to apply slight pressure above the lip to bring the
lip line out.

Step 15) Finally
fill the lips in with a lip stick that is colour coordinated to the liner. When
doing this use tissue or a powder puff around your fingers to prevent your warm
fingers interfering with the makeup (removing it/ smudging it) also it helps to
support your models chin because you can lift the chin so you can work from a
better angle. Now repeat this step on the bottom lip, once this is done
use correction techniques to perfect symmetry and gain a sharp edge. (cotton bud and circular rotation)


What would I have done with the models hair?
Because the model being used for this demo has natural curly
hair I would have kept it down, brushed it through and applied serum to the
ends of the hair to eliminate any fly aways, this way it reflects the theme
‘natural’
What would I have done differently
·
Personally, I would have added a darker brown
eyeshadow as I think this would withstand light better.
·
Because the theme was dewy I wouldn’t have used
a powder to contour I would have used a cream based product because I
personally think this would suit the look and meet the theme better as cream has a dewy consistency.
Brush tip
Don’t ever apply a foundation product using a stipple brush because
you will get lines within your base so I tend to apply with a flat brush and
buff into the skin with a stipple. A flat brush is tightly packed therefore you
won’t lose as much product however if you use the stipple brush you will find
the product will be wasted as it will clog into the hairs half way down.

Make up tip
·
If you have a model with hooded eyes you would
ask them to look straight ahead so you can see where the makeup application
will sit and how it will look, doing this gives you a guide. If you ask your
model to close their eyes you will not be able to realistically see the
location of product. (eyeshadow)
·
The key to a good make up look is skin
preparation and blending
·
To warm up lip liner, squiggle it on the back of
your hand
·
Start neutral and build to progress
I will give a detailed step by step on how to develop this
look from natural to a beach theme using only three products…here it goes!
Look 2
Step 1) Apply
bronzer to give a sun kissed skin effect and not a contour, there is a
difference. To achieve sun kissed skin you must apply bronzer to all the high
points of the face for example the edges of the forehead, cheekbones and bridge
of the nose
Step 2) Anna is
now using a tissue as a barrier for her fingers against the skin because this
will protect the makeup from moving out of place. Now using a rounded eyeshadow
brush and a copper eyeshadow add this to the crease to create a warm transitional
shade
Step 3) use a
powder highlighter to create a subtle glow, apply to areas such as the highest
part of the cheekbones, forehead and chin

What would I have done with the models hair?
Usually I would apply sea salt spray to achieve a beach look
however this makes the hair go hard, if I was to brush the hair it will go
frizzy and non-will not suit the next look which is glamorous. There for I
would wet the hair and set the hair in plats leaving it to dry naturally.
What would I have done differently?
·
I would have added freckles because they are in
trend and the sun brings these out so it would help determine the look easily
·
I would have added blusher as well as bronzer
·
I would have added white eye liner to make the
eyes appear wider
I will give a detailed step by step on how to develop this
look from beach theme to glam using only three products…
Look 3
Step 1) Apply a
dark brown eye shadow to the edge of the eye and blend out and up slightly into
the crease. Matt colours push back and lighter colours come forward, to make
the eyes appear bigger we must contour the eye with warm to dark matt products
because the light shimmer pigment will pull forward instead when caught by
light. Apple black neatly to the centre of the crease to give some the eye
depth, use a clean eye blending brush to smudge this giving a smoky effect.

Step 2) Apply a
gel liner to the upper lash line to give the illusion of a fuller and thicker
lash (No wing). Using a Zoeva 310 spot liner brush and little movements press
the product into the lash line, lift the lid at the brow bone to get a in all
awkward areas. smoke black eyeshadow over the gel liner so this will set the
product, soften it and stop it transferring

Step 3) On the
lower lash line apply the same dark brown that was applied to the crease,
ensure you protect the under eye with tissue as you already have a base and it
will protect it from unwanted fallout.

What would I have done differently?
·
I would have applied a false lash because I
think the eye makeup looks uncompleted without them
·
I would have applied a red lip stick because
dark colours make the lip shrink
·
I would have applied a gloss
What would I have done with
the models hair?
I would have set the hair in
rollers and teased the curls so they were big or create an elegant up do.
Practical task
So, before our practical task we had to divide half of the
class into models and half into makeup artists we then had to set up our kits
at the counter and stand on opposite sides of the room. First, I was a model so
myself and other Models were then delivered two pieces of paper noting the
theme, focus point and location e.g. skin, studio and Lingerie. Our job was to
guide the artist to picking suitable products ensuring they only use three.
Once the look had been completed feedback was given and all artists
moved up to the left enabling us to work on different face shapes and skin types
Look 1. Products used and reasons why

sports wear is all about dewy skin. i used Illamasqua skin base because it gives a full coverage and is silicone based. i used a powder highlighter to achieve a luminous glow and from the same pallet i used the bronzing powder to contour subtley.
Look 2.


Look 3.
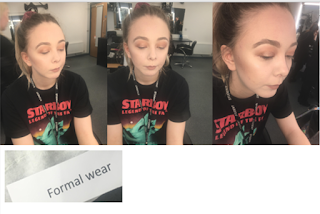 with this look i think a delicate winged liner would have matched the theme because i see formal ware as smart/ casual daily work wear and i would expect to see a lady who works in an office with this type of make of make up. Natural and sophisticated overall was my aim and i think i have achieved this although there is still room left for improvement as i have highlighted what i could have done better or what i will do next time if i choose to recreate this look.

No comments:
Post a Comment